3-2. Inserting a single hole
3-2-1. Function Description
It mainly realizes inserting the selected hole cavity feature on the existing block, and the hole cavity is a single hole feature. Applicable environment: Part environment Environment: part environment.
3-2-2. Function interface
3-2-3. Operation method
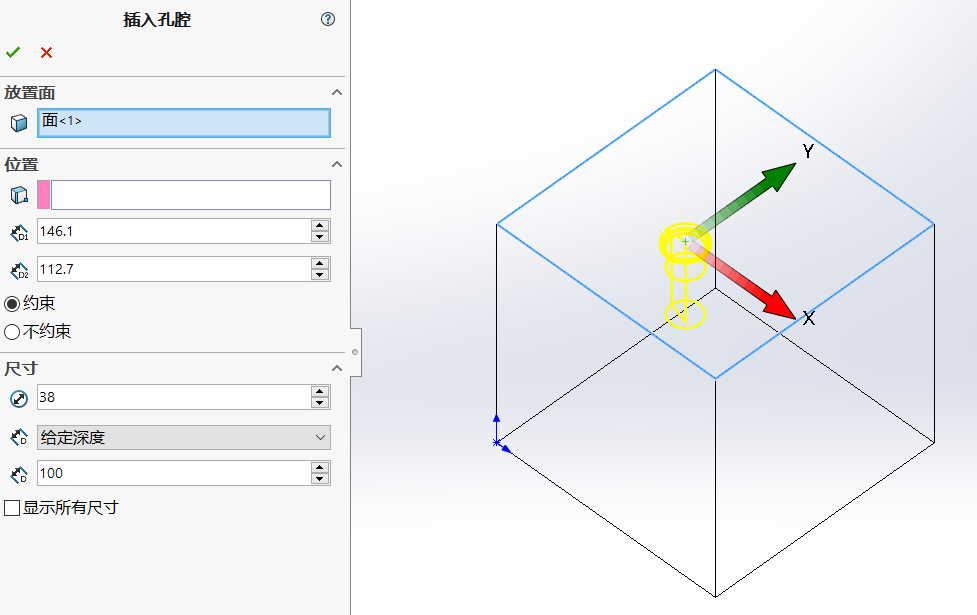
1、From the list of hole cavity library, double click to select a hole cavity (single hole), the corresponding interface will pop up in the SW property page.
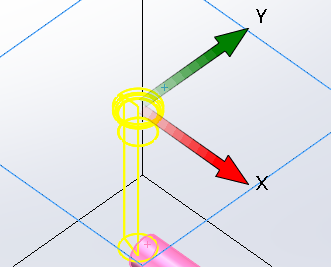
2、Select the placement surface of the hole cavity, i.e. the surface of the valve block, and the hole cavity preview and position coordinate system will be presented automatically.

3、You can directly drag the position coordinate system to move the orifice cavity to the appropriate position.
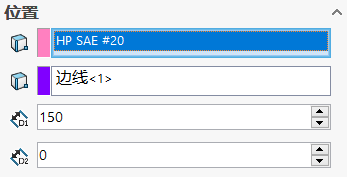
4、The position of the hole cavity can be defined directly by selecting the position reference, the selectable reference types are: point, line, surface, hole cavity.
Note: The choice of position reference, there are a variety of combinations of cases, see "Basics" page "position reference definition".
The coordinate value in the position, + value means it is in line with the reference axis, - value means it is in line with the reference axis.
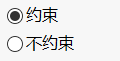
5, "Constrain" and "Unconstrained" check box, used to define whether to use Solidworks geometric constraints or dimensional constraints to define the hole cavity position after the creation of the hole cavity.
- Define the cavity "dimensions"
6.1 Define the diameter of the bottom hole of the cavity and modify the diameter value directly.

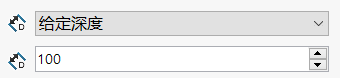
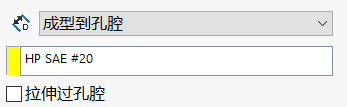
6.2 Define the depth of the bottom hole of the cavity, there are 3 ways to define the depth
a) Select "Given depth" to define the depth of the cavity directly.
b) select "Full penetration", the cavity depth will be directly through the valve block.

c) select "Form to cavity", the cavity depth will be stretched to the center axis of the selected cavity by default.
If "Stretch over cavity" is checked, the cavity depth will be stretched beyond the diameter of the selected cavity.
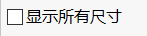
- "Show all dimensions" checkbox, if checked, all cavity dimensions will be retained after the cavity feature is created, if unchecked, only the bottom hole diameter depth and countersink diameter depth (if any) will be retained after the cavity feature is created.
Tips:
*If the first reference is a cavity when defining the position, the cavity depth is automatically switched to the "Stretch to cavity" option and stretched to the selected reference cavity. *# 3-4.